Nikon Coolscan color negative scanning
Nikon Coolscan, Vuescan settings for negatives
Suggested Vuescan settings for scanning negative strips to JPG with Nikon Coolscan 5000 and the SA-21 strip film adapter. Similar settings can be used for Nikon IV(LS-40), V (LS-50) and 4000. These settings are for use with Vuescan 9.7.90. Other versions have similar settings.
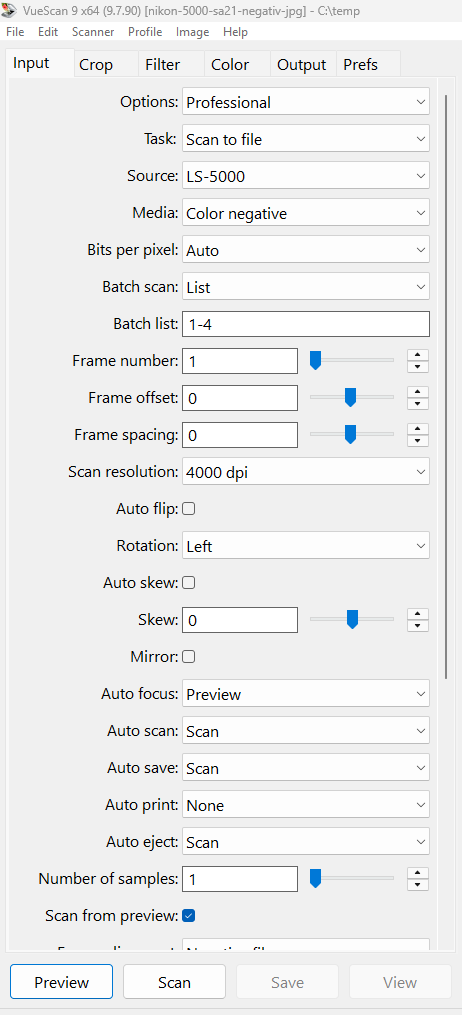
Input Tab
Media = ”Color negative” or ” B/W negative”.
Batch list: Choose “1-4” if scanning 4 pictures on the strip
Auto Focus: Choose “preview” (if scanning from preview) or “scan” if making preview and scan (autofocus only on scan)
Auto Scan = “Scan” ( automatic start )
Auto Eject = “Scan” ( automatic eject after scan )
Scan from Preview = on, if you want to scan directly from preview. This will save time, and works well for negatives ( less well for slides ), because of the narrow tonal range of negatives. If you have problems with over or underexposed pictures you should scan with preview.
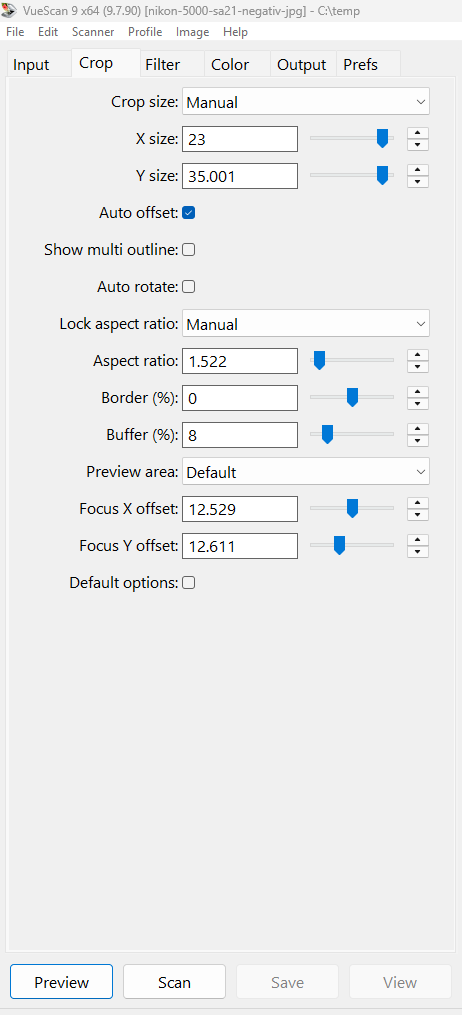
Crop Tab
Choose Crop = manual, x = 23, y = 35 (approx. values, use up and down arrows to adjust)
Auto Offset = on (this finds the corner of each image)
Border = – 0.8% or -1,2% this will remove some of the border, but save you some manual cropping. (In the picture it is 0).
The idea is that the scanner should locate the corner of each picture (auto offset = on) and then crop it. This works usually fine, but if pictures are very unevenly spaced or even overlapping it does not work. If the film strip does not crop correctly try to feed in the opposite direction or split in smaller parts.
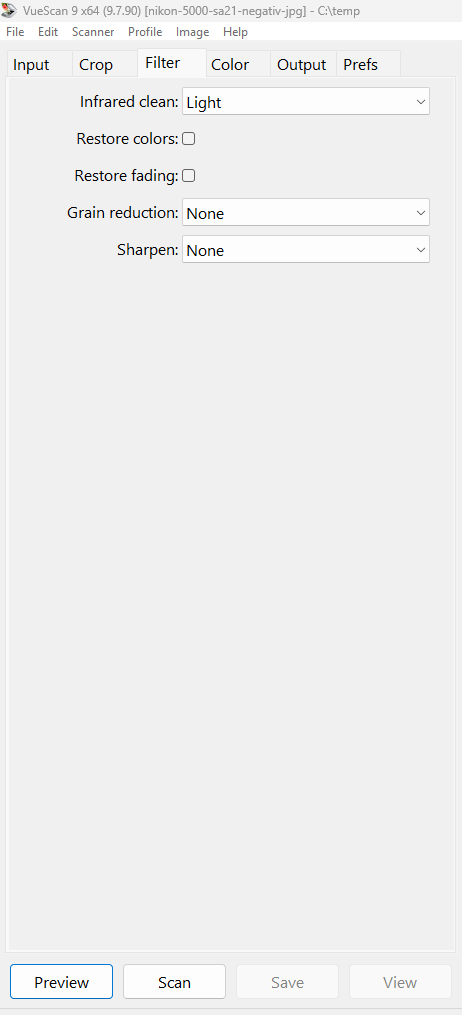
Filter Tab
Infrared clean = “Light” ( Do not use infrared clean on b/w film ).
Restore fading: Try Restore fading = “on” if your pictures are changed in color. If your pictures have good colors keep it off. Restore fading is best used together with Output tab, Color balance = “Neutral”.
Sharpen: Choose “sharpen = off” for the most natural look. Choose “sharpen = on” if you prefer a little more sharpness, but it will look less natural.
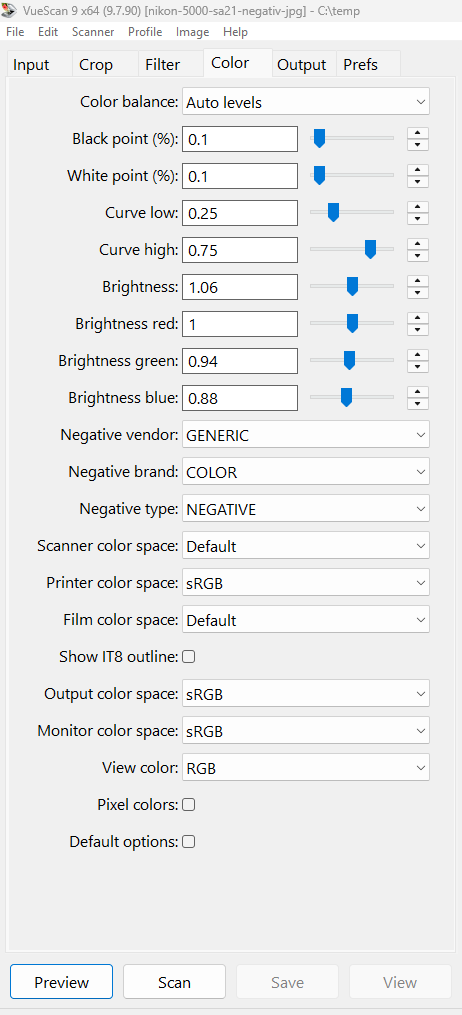
Color Tab
Color balance = “Autolevels” will correct some color cast. Or you can choose “neutral” if your pictures has good colours.
Black Point: Default Value is 0, however this gives the picture a washed out look. Choose 0.1.
White Point: The default Value is 1, meaning that 1% of the pixels is made pure white. However this removes a lot of detail in the light parts. Choose 0.1.
Curve Low, Curve High: If you want greater contrast try Curve Low = 0.30 and Curve High = 0,70, but you will lose some detail in the dark parts. The best is to keep the default values and make adjustments later if needed. To view the curve choose “image”, “graph curve”.
Brightness = 1.06, red = 1, green = 0.93, blue = 0.88 ( this is a color temperature of 5500K giving a slightly warmer look, or you can just leave these 4 settings at 1 (default).
Negative Vendor = “Generic” or choose film type. For B/W negatives try “generic” (dark film) or ”Ilford” (light film).
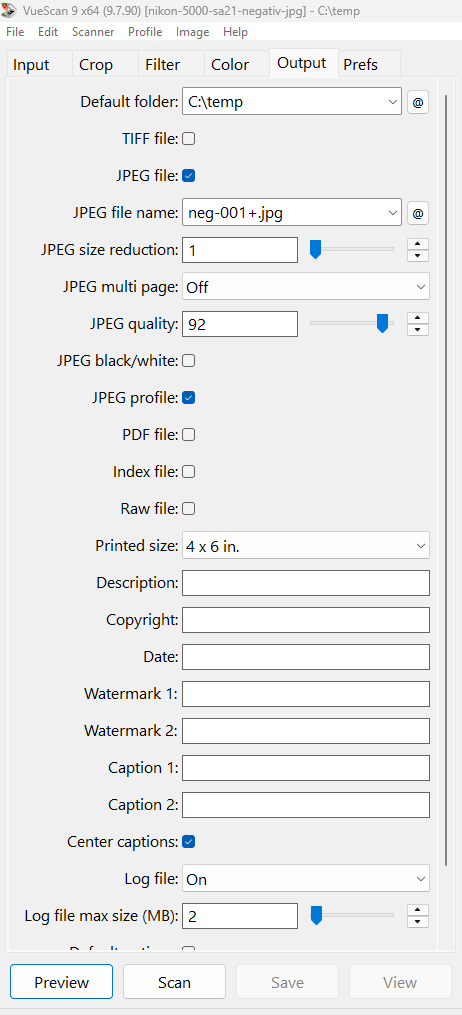
Output Tab
JPEG File name: Choose “negative-001+.jpg” or whatever you like, the plus sign means that the pictures are autonumbered starting with “001”. Remember that if you delete pictures during scanning it will fill out the “empty” number before going on.
Printed size: This setting does not really matter for scanning to file, when you set the dpi manually on the input tab (as here). However it can influence cropping if you use the setting “Crop”, “Lock Aspect Ratio = Image Size”, so it is good to keep a value of same proportion as the slides.
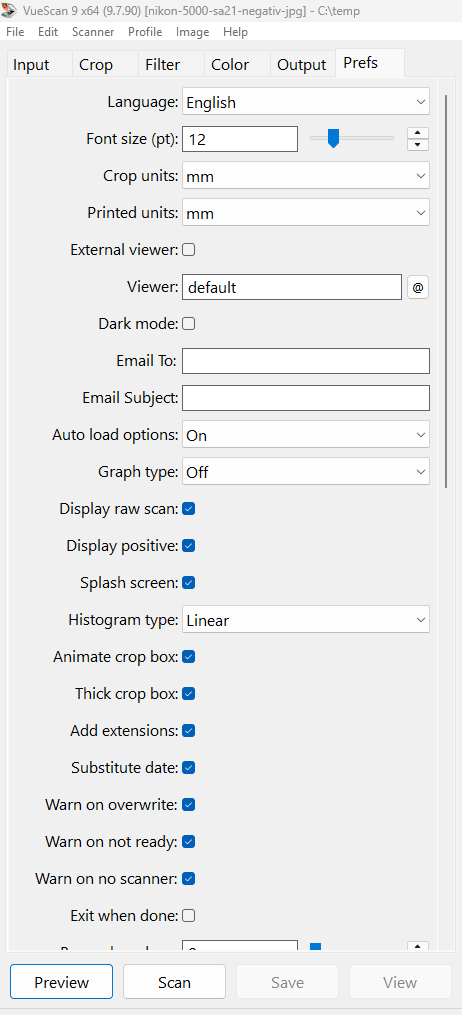
Prefs Tab
External viewer = off, if not the picture will pop up in Windows every time you scan.
Beep when done: Choose “4” if you want the computer to beep 4 times when scanning is finished.
Vuescan negative scanning tips
Save your setting by choosing “File”, “Save options”.
Release memory: Choose “Image”, “Release Memory”
To manually eject the strip choose “Ctrl + J” or choose ”Scanner,” ”Eject”
Often the colors in the negatives have changed over time, and you cannot see that directly on the negatives. If you take the time to find the right settings in Vuescan you can often get good pictures without further editing. If you are not satisfied with the colours you can try
1. Adobe Lightroom, develop mode, try auto whitebalance or autotone (right panel).
2. Try the software “Ashampoo Photo optimizer 7”
If you have problems getting the colors right or finding the right settings in Vuescan you can try the more advanced two step method described here Nikon Coolscan color negative RAW scanning
Read more here
http://www.hamrick.com/vuescan/html/vuesc.htm
(c) DataNord ApS 2026